Brightest
  • 👋Welcome to Brightest
  • Overview
    • 💡Brightest 101
    • 🔅New Client Onboarding Sequence
    • ✨Key Brightest Capabilities
  • Fundamentals
    • đŸ› ī¸Getting set up
      • 👩‍đŸ’ŧGetting Started for Brightest Admins
      • 📝User Permissions
      • 📨Inviting Team Members
        • 🔑Two-Factor Authentication
      • đŸ–ŧī¸Organization Settings
        • đŸ“ļESG and Sustainability Settings
      • 🔓Single Sign-on (SSO)
        • đŸ‡Ģ🇲Microsoft SSO
        • đŸ‡Ģ🇲Okta SSO
    • 📋Navigating Brightest
  • Product Guides
    • 📊KPIs and Custom Metrics
      • â„šī¸Creating a KPI
      • â„šī¸Linking KPIs to Global licenses
      • đŸ—‚ī¸Organizing your KPIs
        • KPIs & Global licenses
      • đŸ’ģEntering KPI data
    • đŸŽ¯Goals and Targets
      • â›ŗSetting Goals
      • Uploading Data to Goals
      • 📉Setting Environmental or Climate Related Targets
      • 📊Materiality (single)
    • âš–ī¸Double Materiality
      • 🌐Double Materiality in Brightest
    • 🌎CSR & Impact
    • ⚡Actions
    • đŸ“ĨSurveys
      • 📑How to make a survey
        • Survey form features
    • đŸ‘ĨPartners
    • đŸĸAssets
      • đŸ—ī¸Bulk Asset Creation
    • â˜ī¸Carbon Accounting
      • đŸŒĨī¸How Carbon Accounting Works in Brightest
      • ➗Emissions Factors
      • 👩‍đŸ”ŦConfiguring and Customizing Emissions Factors
      • 1ī¸âƒŖScope 1 GHG
      • 2ī¸âƒŖScope 2 GHG
      • 3ī¸âƒŖScope 3 GHG
    • đŸŒŋCollecting and Importing Sustainability Data
      • đŸ‘ŖUploading Asset Footprint Data
        • Using the Add Tool
          • Adding Water Data
          • Adding Fuel Data
          • Adding Waste Data
        • Uploading CSV Files
        • Uploading Utility Invoices
      • 🚛Uploading Transit Data
      • 💱Financial Transaction (Spend) Data
        • 💸Spend Capabilities
      • đŸ›ī¸Product and Materials Data
    • 🚩Tags
    • 📝ESG & Sustainability Reporting
      • ESG Reporting Standards & Frameworks in Brightest
  • Use Cases
    • 🏭GHG Emissions Measurement
    • đŸ–Ĩī¸Brightest for IT Teams
  • Roadmap
    • 🔆Our Product Roadmap
  • FAQs and Support
    • ❓FAQs
    • 📧Contact Us
Powered by GitBook
On this page
  • How to use Tags
  • Creating, Editing, and Deleting Tags
  • Bulk Creating and Editing Tags
  • Filtering Data by Tags
  • Assigning Tags
  • Assets
  • Transit and Spend Activities
  • Partners
  • Actions
  • Materials
  1. Product Guides

Tags

Tags are flat metadata tags that can be color-coded, assigned, and saved to Brightest objects

PreviousProduct and Materials DataNextESG & Sustainability Reporting

Last updated 6 months ago

A tag is a flat metadata element that can be attached to one or multiple Brightest objects to organize and filter information from a reporting standpoint.

Generally, the best way of thinking about tags is:

  • How does your organization want to organize and filter information?

  • What are the different ways you'd like to "group" or report on information?

Tags can be assigned and saved to Brightest objects, including:

  • Materiality pillers

  • Projects

  • Events

  • Assets (offices, sites, buildings, factories, vehicles, and equipment)

  • Materials

  • Financial transactions (spend)

  • Partners/Suppliers

Common examples of tags include:

  • Materiality or strategy themes, topics, or pillars

  • Risk-level indicators

  • Transaction tagging (utilities, purchased goods & services, business travel)

  • Priority campaigns, themes, or organizational initiatives

  • Business unit, brand, or product-level information and classification

  • Supplier and customer segmentation

Tags are used to group and filter data and reporting information. They do not allow for hierarchies. All tags are available to a license-user for use (tagging), but they can only be edited or modified by admins and managers on a license. Global and regional licenses can share tags, or have their own. You may create as many tags as you would like, but remember that it may become a cumbersome task with more than a few dozen tags.

How to use Tags


Creating, Editing, and Deleting Tags

To create, edit, or delete tags. Navigate to Settings. There you'll find the "Tag Management" Section.

To create a new tag, just starting typing the name of the new tag that you'd like to create. When you're done typing, select "Create 'Name of new tag'" or tap "Enter" on your keyboard. The tag will then appear in the "Tag Management" section.

To change the color, just click on the tag that you'd like to edit and choose a color. To save your changes when you are done creating or editing tags, select "Save Changes".

You can also create new individual tags by:

  1. Select "Manage Tags"

  2. Select "Add New"

  3. Enter the name of your tag, the 6 digit hex code for the color, and toggle on the "active" switch to use throughout the platform.

  4. Select "Save"

If you would like to delete a tag, click the "x" next to the name of the tag you would like to delete, and select "Save Changes". Please note: if a tag is deleted, any tag-based reporting or materiality information associated with that tag will no longer be able to be viewed on the basis of that tag (the underlying information however will still exist in your account).


Bulk Creating and Editing Tags

If you would like to create multiple tags at once:

  1. Select "Manage Tags"

  2. Select "Import Tags via CSV"

  3. Download and fill in the CSV template

    1. Name - Enter the name of the tag (Required)

    2. Color - Enter the 6 digit hex code (Optional)

    3. Active - Enter "True" to make the tag active to use throughout the platform (Optional)

  4. Upload the completed template and review your file

  5. Select "Save"

To bulk edit tags:

  1. Select the "Manage Tags" button

  2. Select the tags that you would like to edit by checking the box next to them

  3. Select which field you'd like to edit, and enter or select the new value

  4. Select "Save"


Filtering Data by Tags

Tags are a way to view and filter data in different ways, usually based around data workflows and company goals or initiatives.

In the Sustainability Module, you can filter your assets, transit events, and spend events by tag.

In your Assets tab, simply click on the "Tags" Column to group your assets by tag.

In your Spend and Transit tabs, select the "Filter" option, and then select "Tag" in the "Add a Filter" menu.

Once you've selected your filter, you can then use the drop-down menu to select which tags you would like to see.


Assigning Tags

Assets

Transit and Spend Activities

Bulk assign tags to Spend and Transit Activities

Partners

Actions

Materials

You can also deactivate tags by selecting "Manage Tags" then select the edit button next to the tag you would like to deactivate. Switch the "Active" toggle off and select "Save."

Select the bulk edit button in the corner (next to the export option)

Back to

To assign a tag to an asset, navigate to the Assets tab in your Sustainability Module. Once you've manually added or uploaded (via CSV) your assets, they will appear in the chart. Then assign a tag by selecting the icon next to the asset in the "Tags" Column.

To assign a tag to a transit or spend activity, navigate to either the Transit or Spend tab in your Sustainability Module. You'll then have the option of assigning a tag during the manual creation of an event, or you can assign tags to assets in your spreadsheet prior to CSV upload. If you need to edit or assign tags after the event has been created, select the icon to edit the entry and assign your meta tags.

To bulk edit and assign tags to multiple spend or transit entries, navigate to the correct event tab (either Spend or Transit depending on where you've added the data) in your Sustainability Module. First, check the boxes of the entries you wish to assign a tag to, then select the icon (between the "Filter" and "+Add New" Buttons at the top). The "Bulk Edit" Menu will then appear. Select "Meta tags" in the drop-down Field section, then select the tag(s) that you would like to assign to those entries and select "Save Changes".

To assign a tag in your Partners Module, navigate to the Partners tab. In the "Tags" Column select the icon, you can then use the drop-down menu to select which tags you would like to assign to that partner.

To assign tags in your Action Module, first create your action or event. Once your action has been created, you'll see it listed in your Active tab. Select the icon, then use the drop-down menu to select which tags you would like to assign to the action.

To assign tags to materials, navigate to Settings, then select "Edit ESG and sustainability settings". Once there, select the Materials tab. You can assign a tag upon adding a material (both manually in the platform and during CSV import). If you would like to assign a tag to an existing material in the chart, use the icon to edit the entry and assign tags using the drop-down menu.

Back to

🚩
Creating, Editing and Deleting Tags
Bulk Creating and Editing Tags
Filtering Data by Tags
Assigning Tags
Back to top of the page
top of the page
top of the page
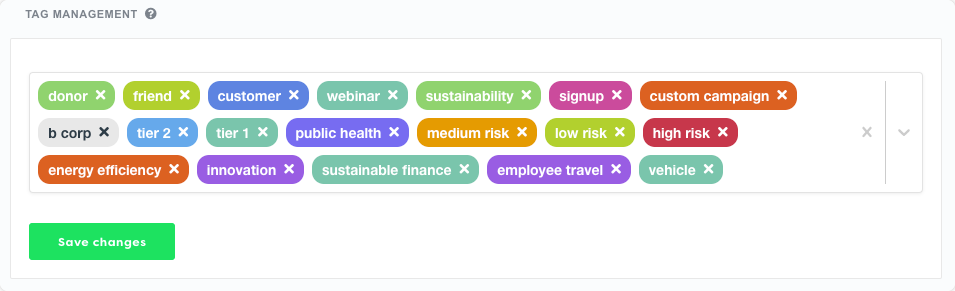
Brightest's Tag Management Section located in Settings
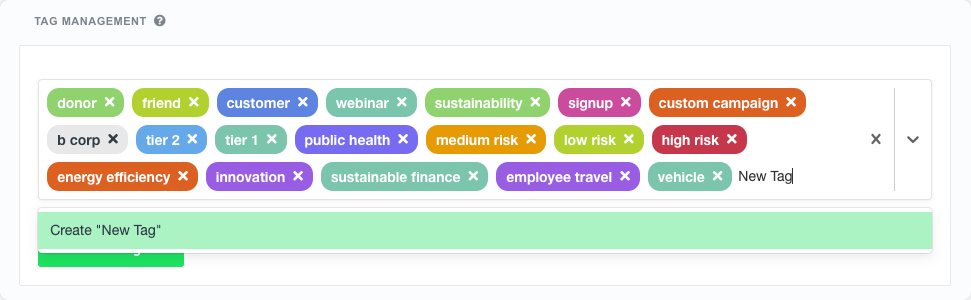
Start typing the name of your new tag, then select the Create "Name of New Tag" or tap Enter on your keyboard.
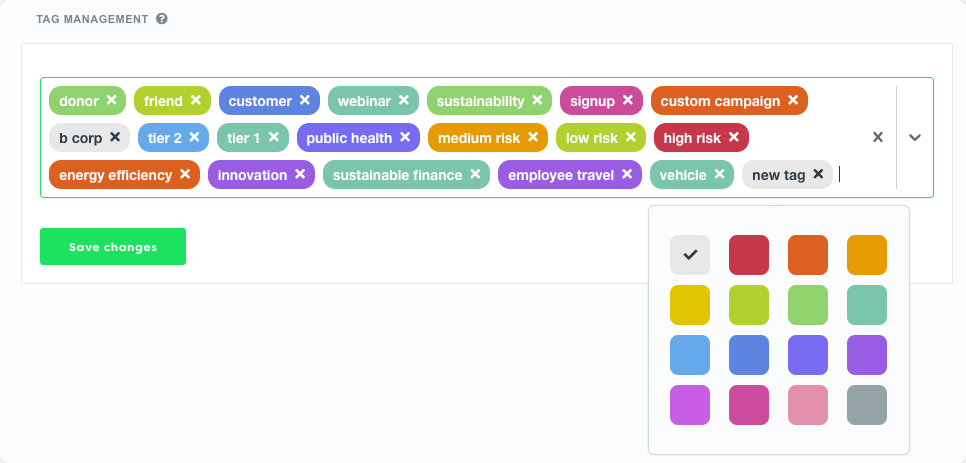
To change the color of a tag, click on the tag, then choose the new color, and select "Save Changes"
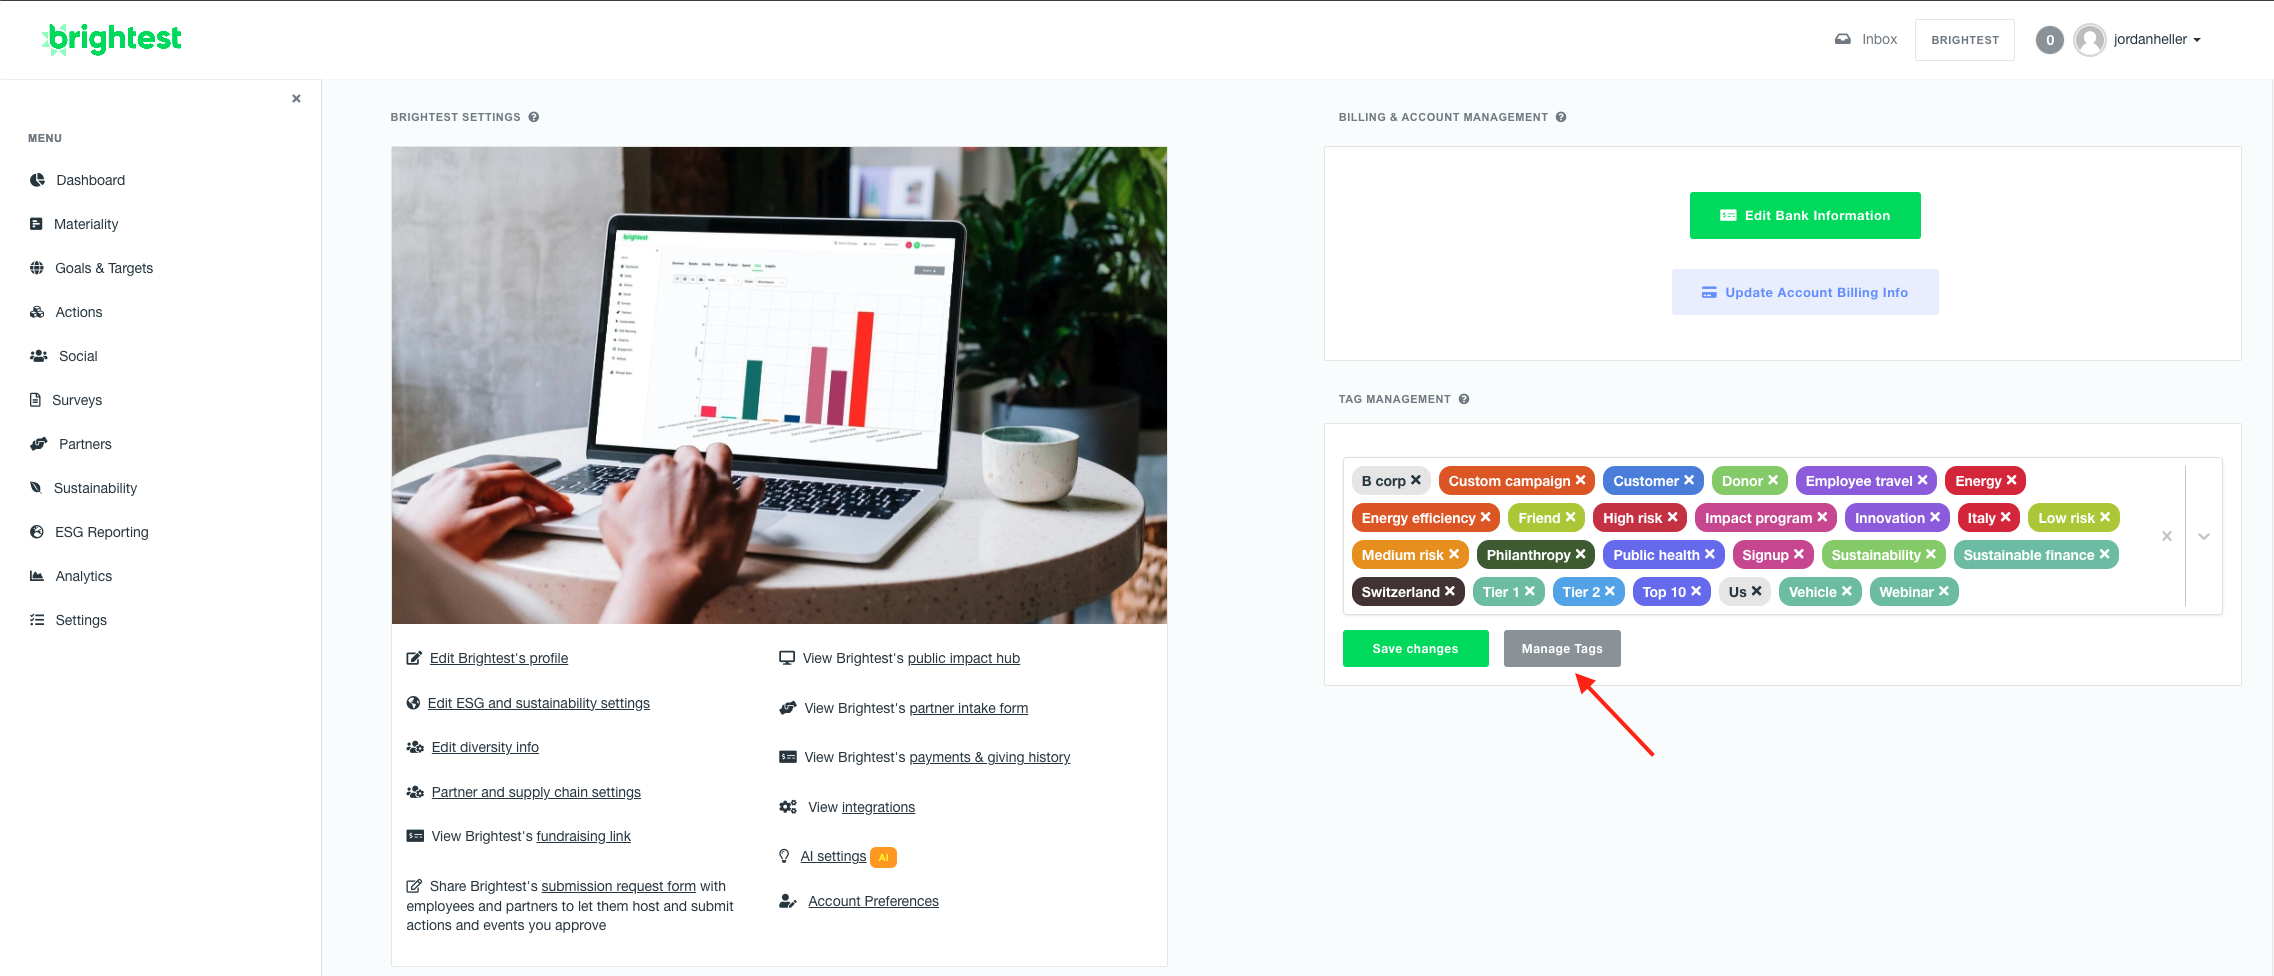
Step 1: Select "Manage Tags"
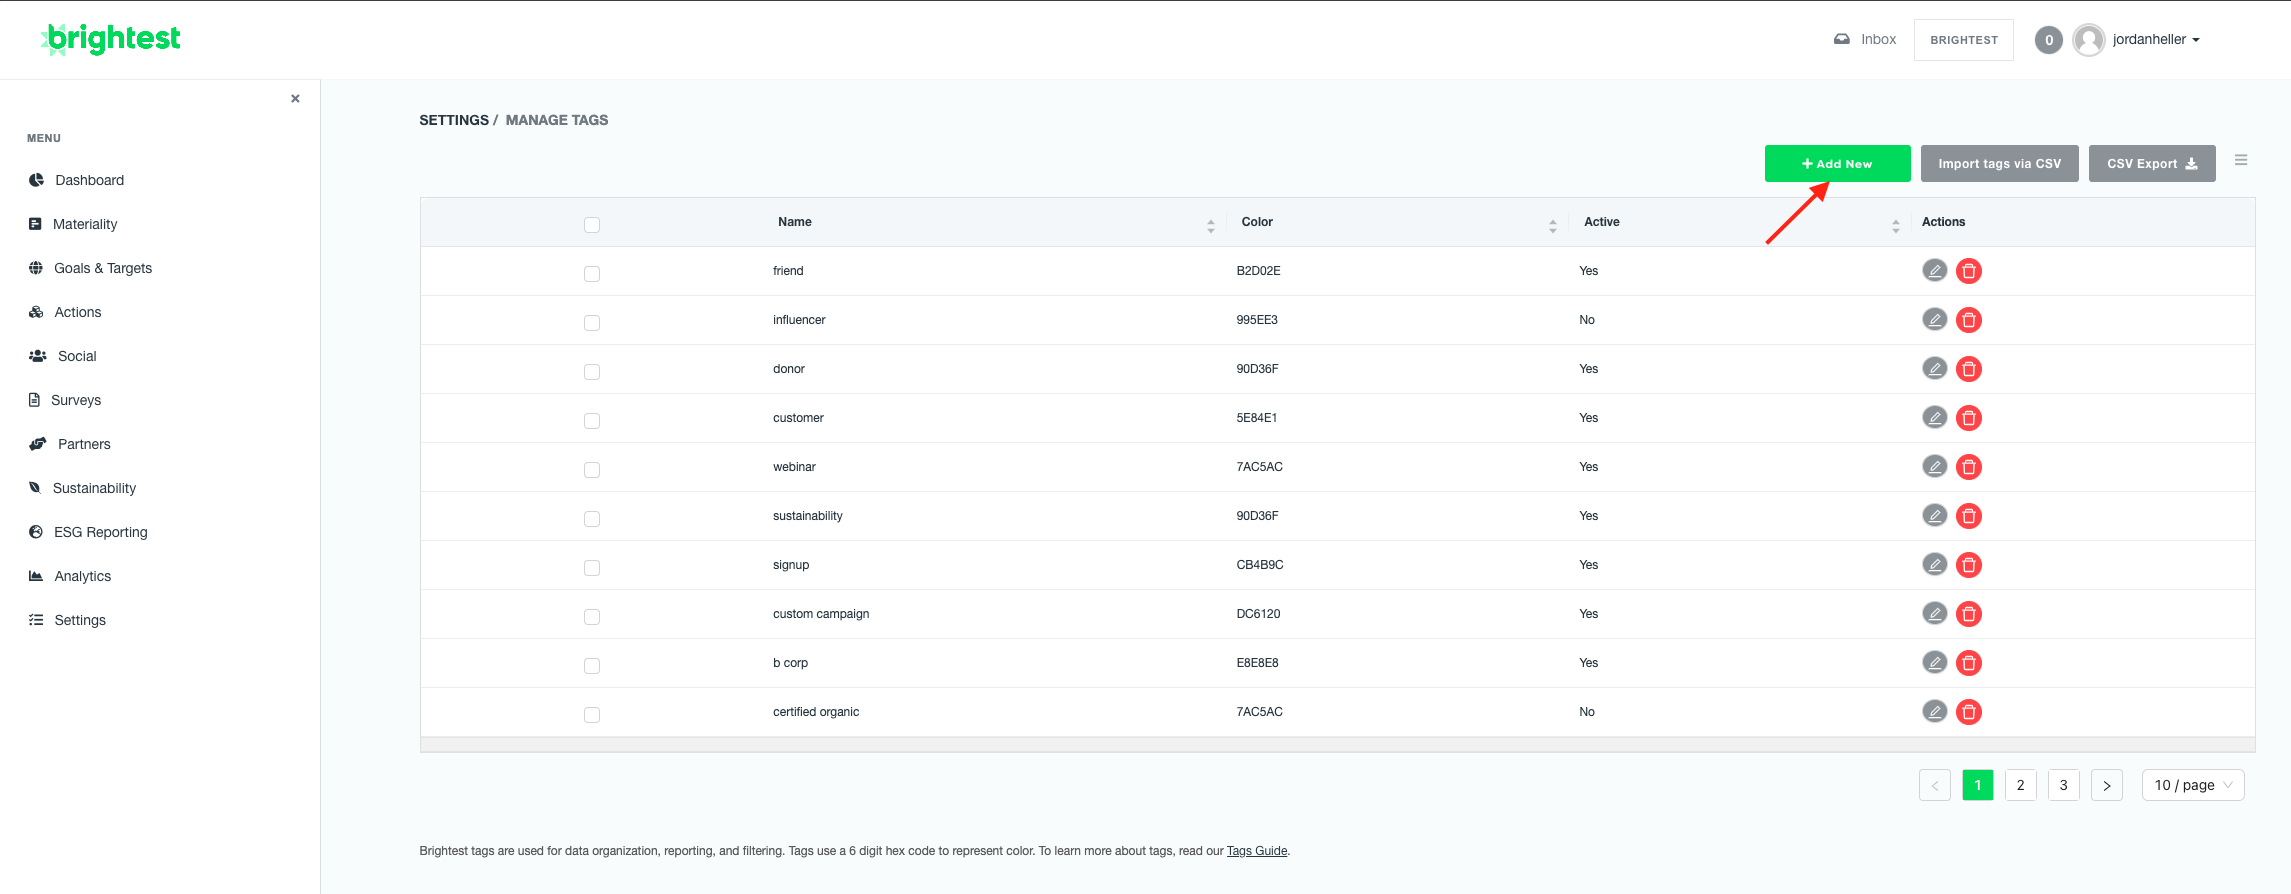
Step 2: Select "Add New"
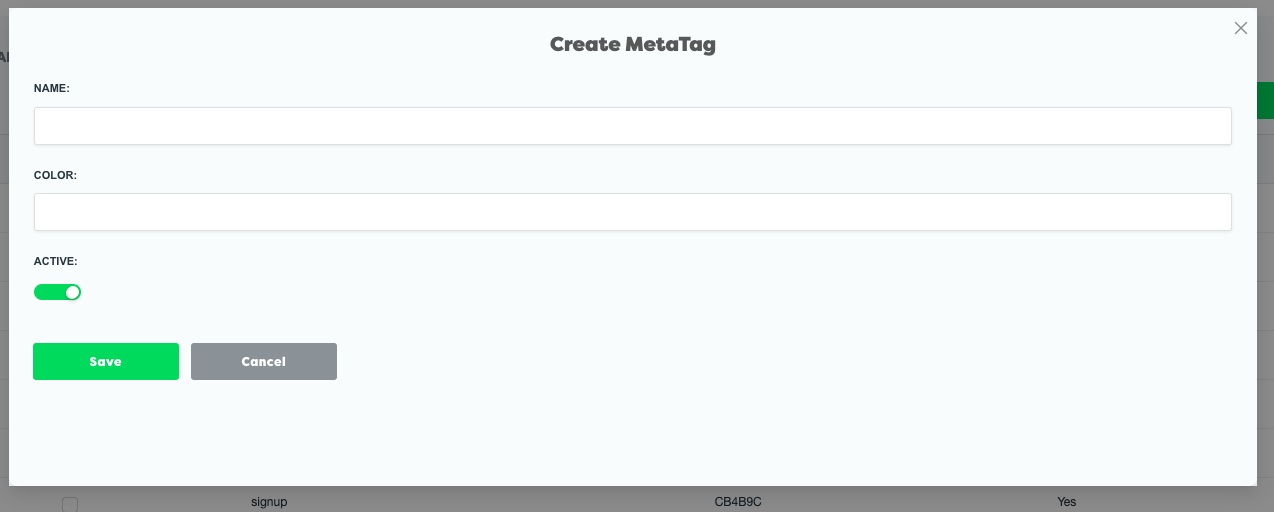
Step 3: Enter the tag information and select "Save"
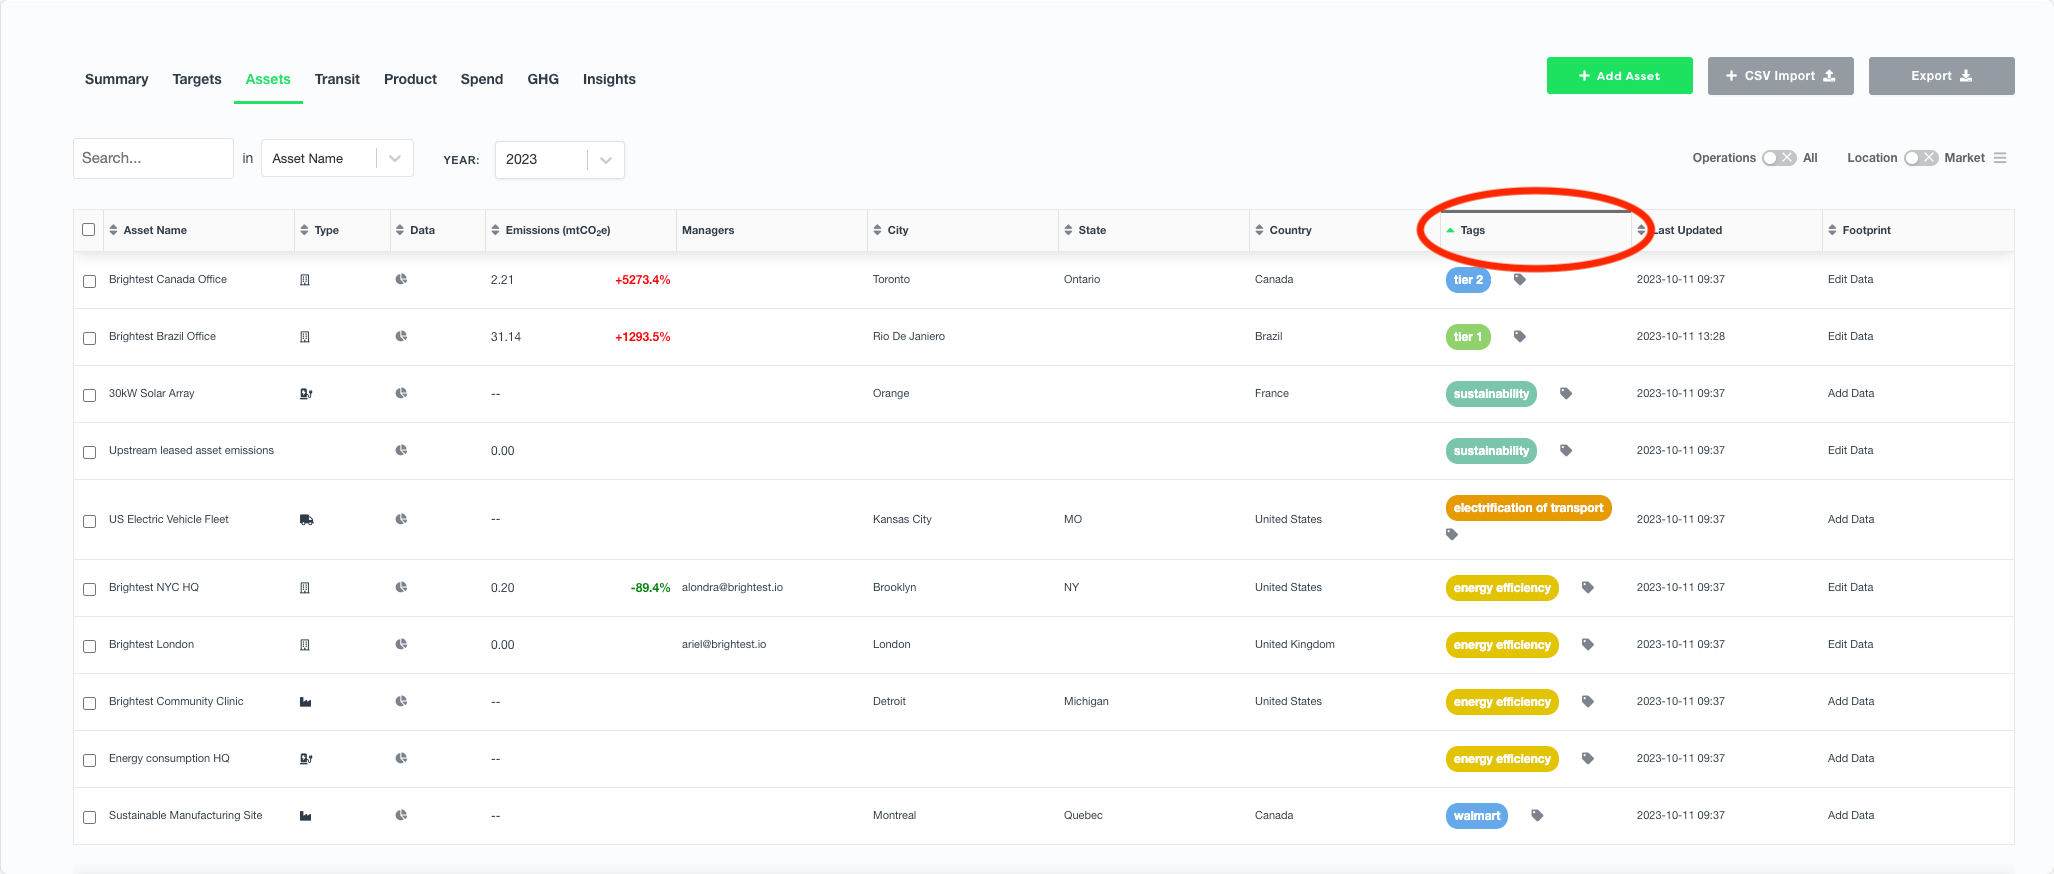
To group assets by tag, simply click on the "Tags" Column.
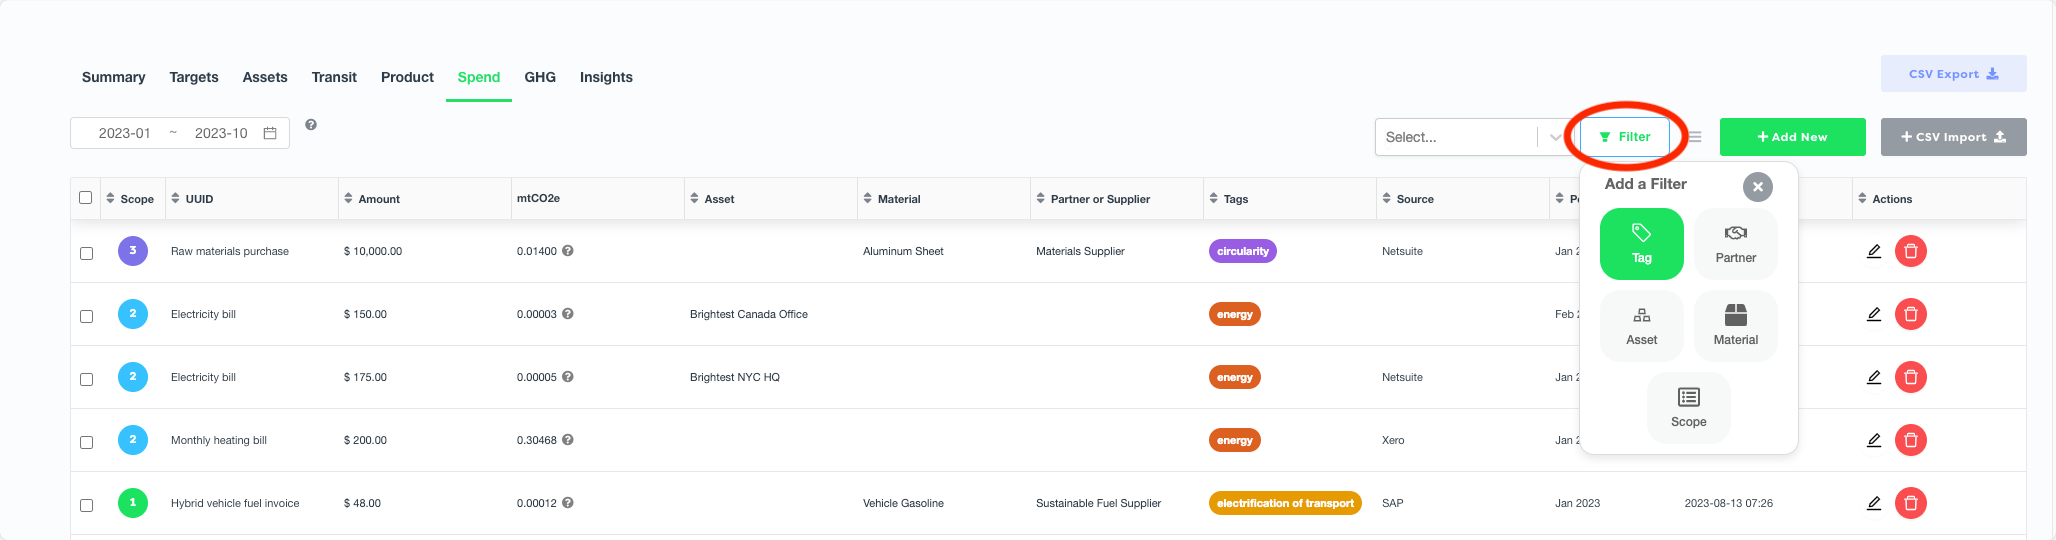
Select "Filter", and then select "Tag" in the filter menu
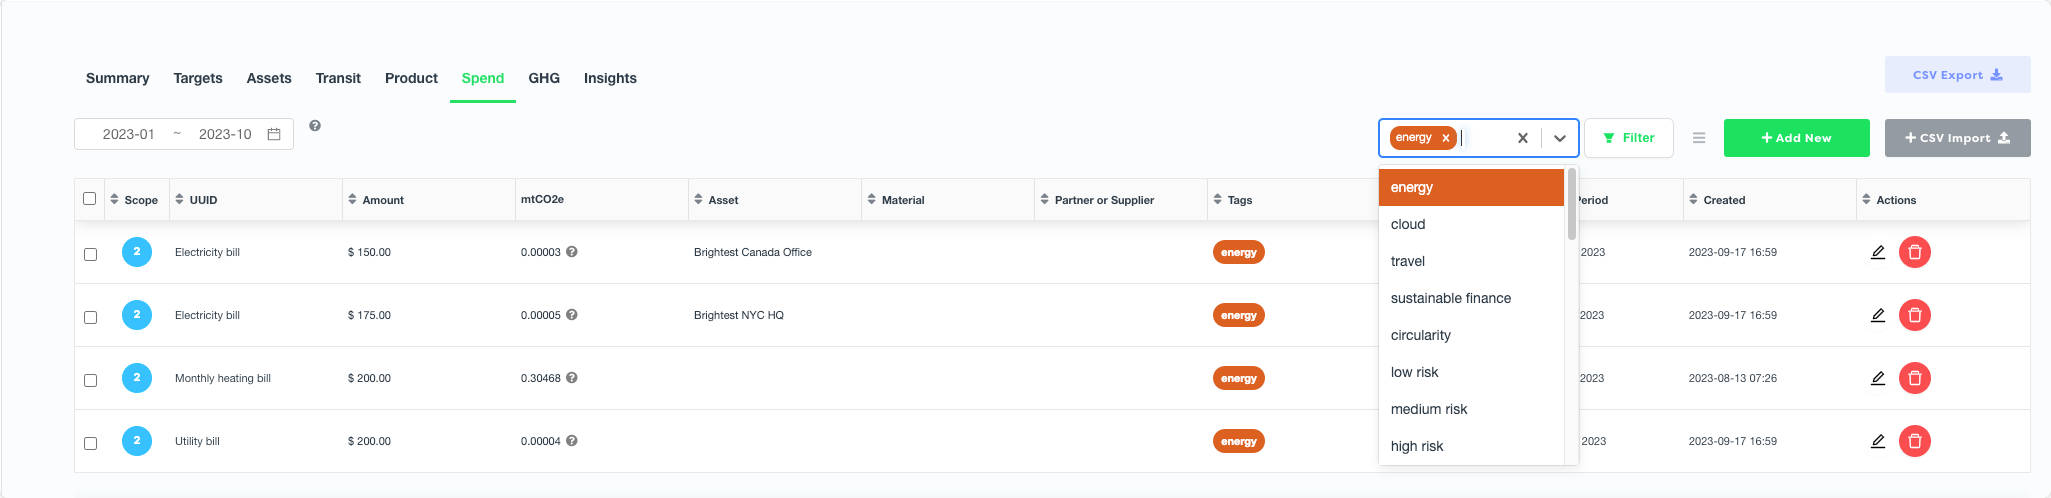
Use the drop-down menu to filter which tags you would like to see
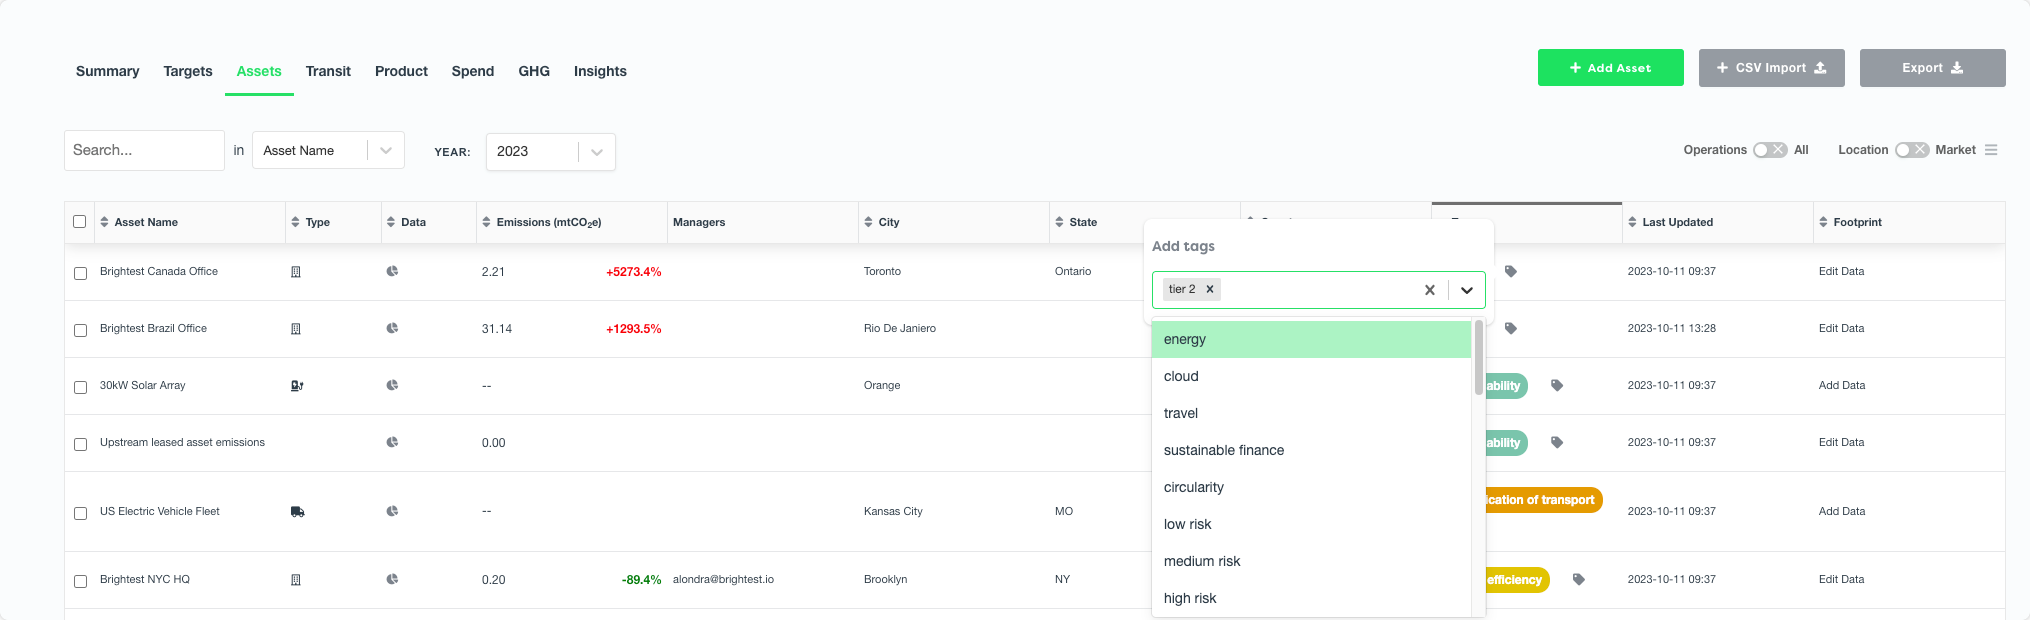
Select the "tag" icon in the "Tags" Column to assign a tag to an asset
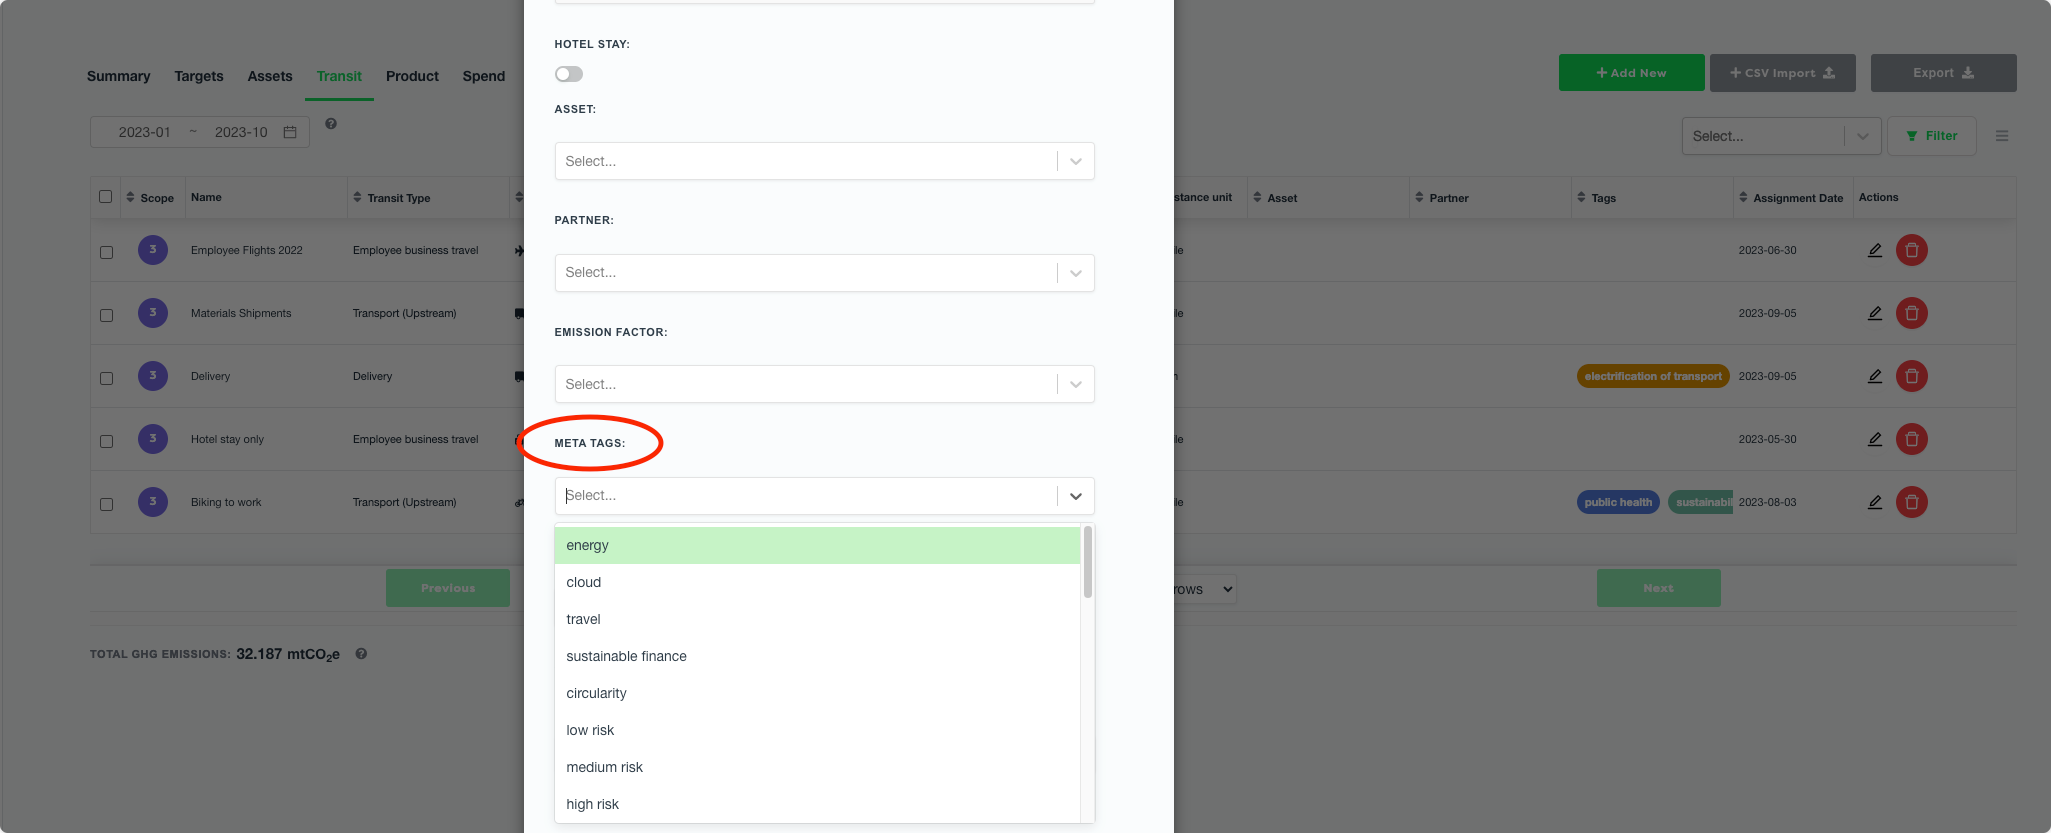
Assign a meta tag upon creation of a spend or transit event, or assign in your spreadsheet prior to CSV upload.
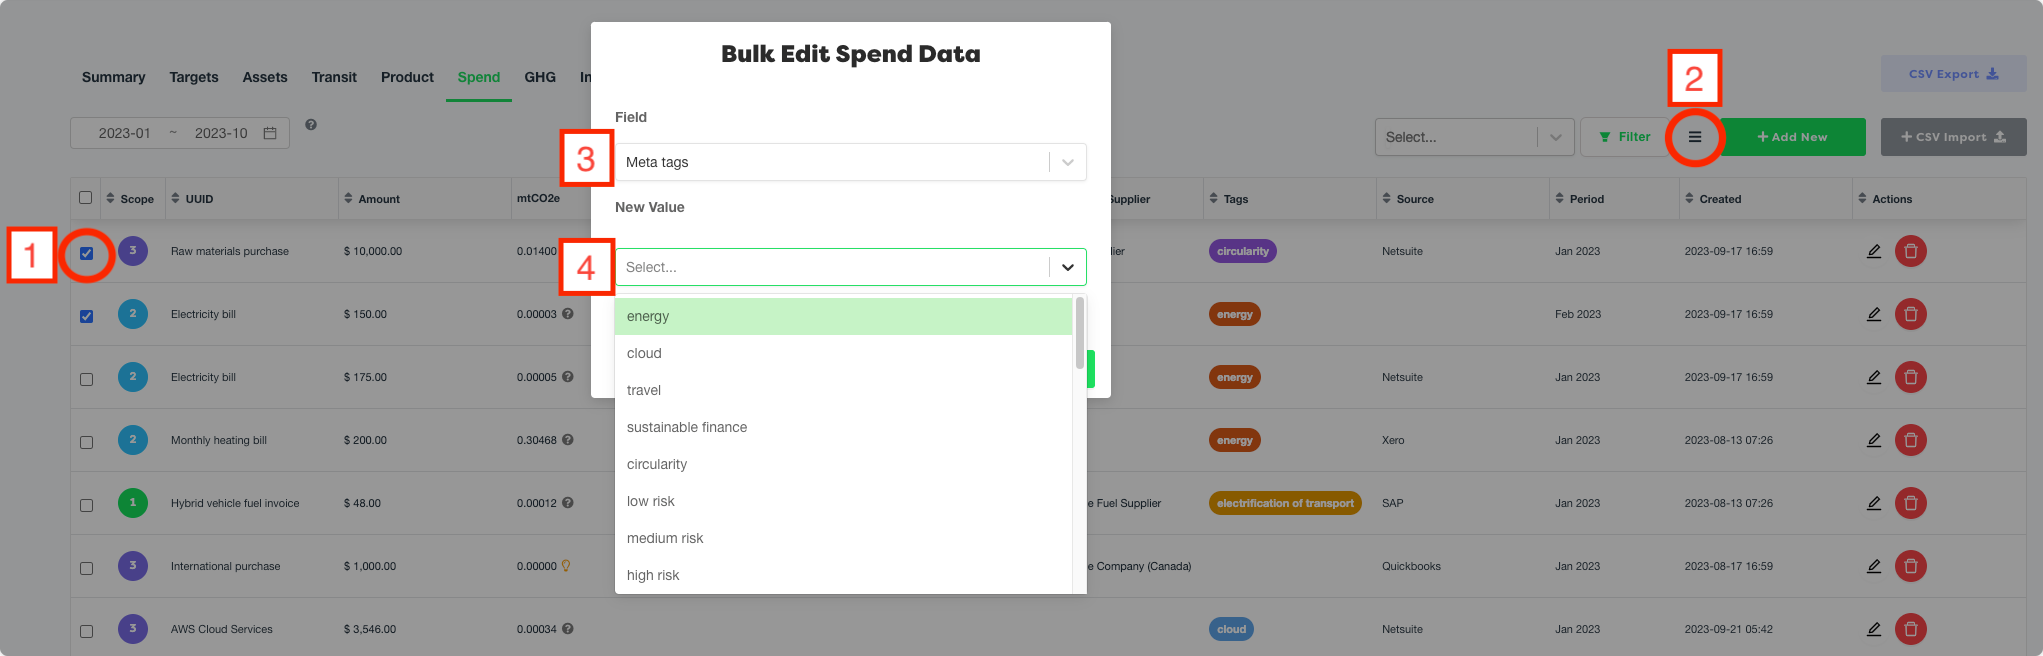
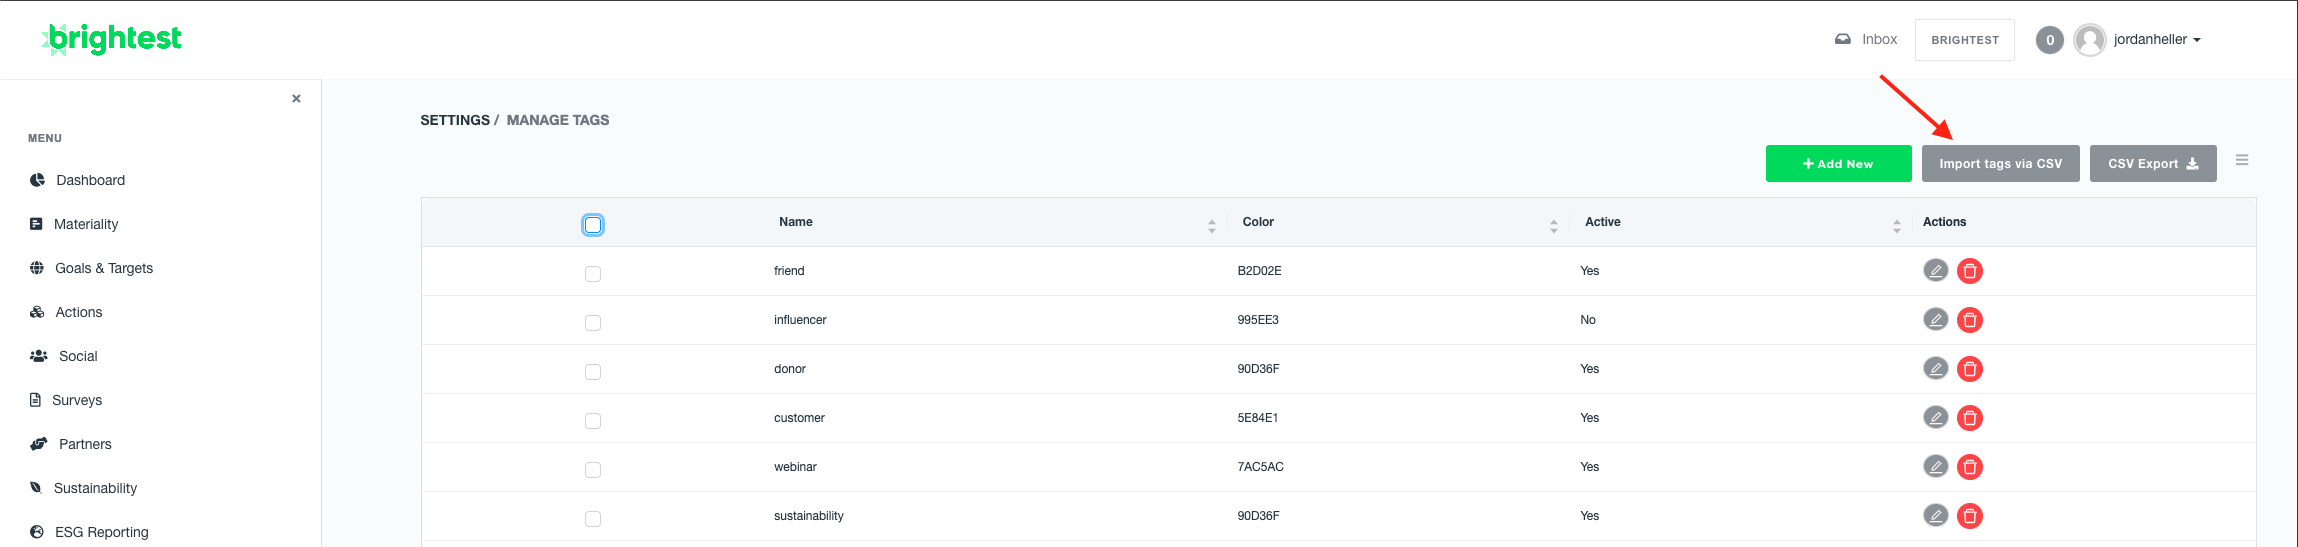
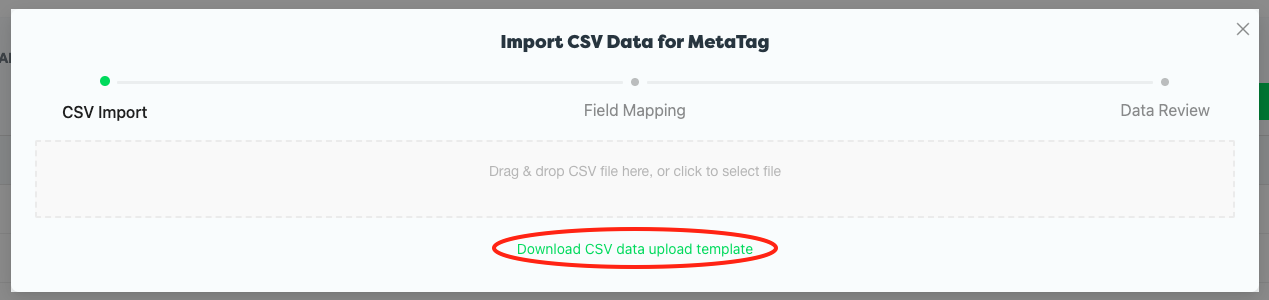
Follow the four steps to bulk assign meta tags to spend or transit events
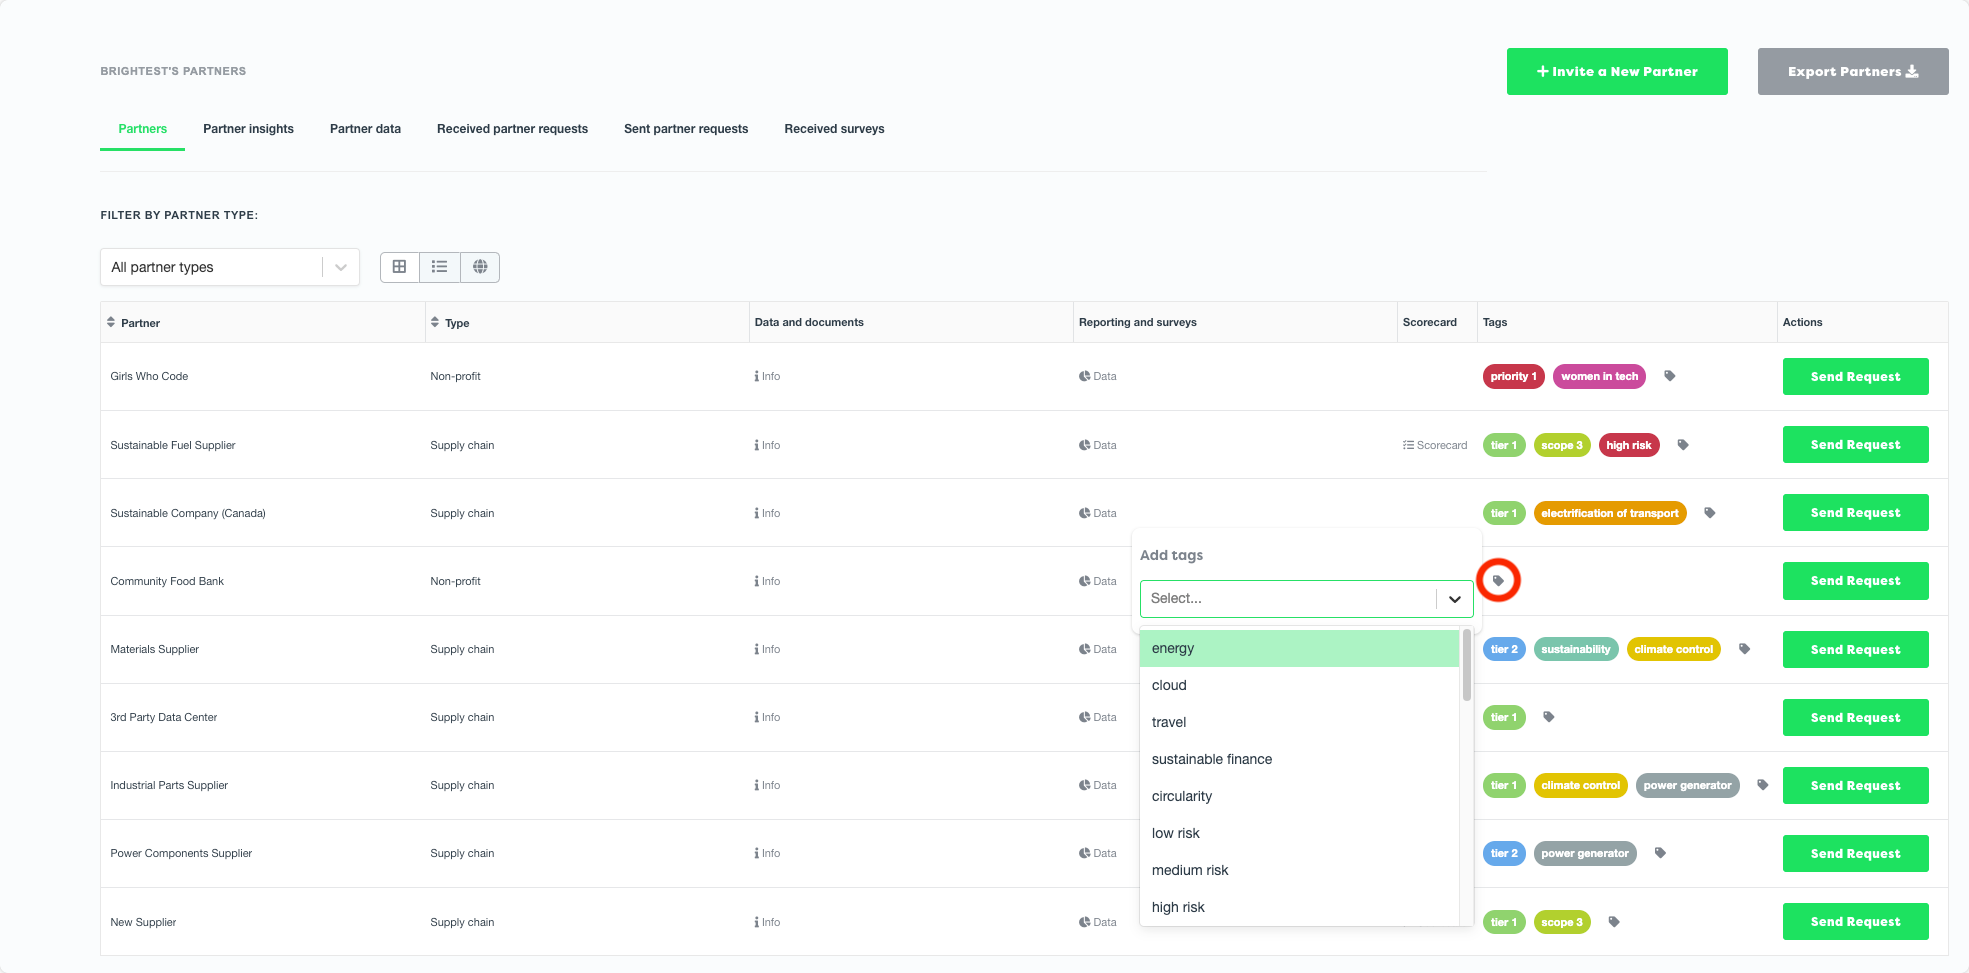
Use the "tag" icon to assign tags to partners
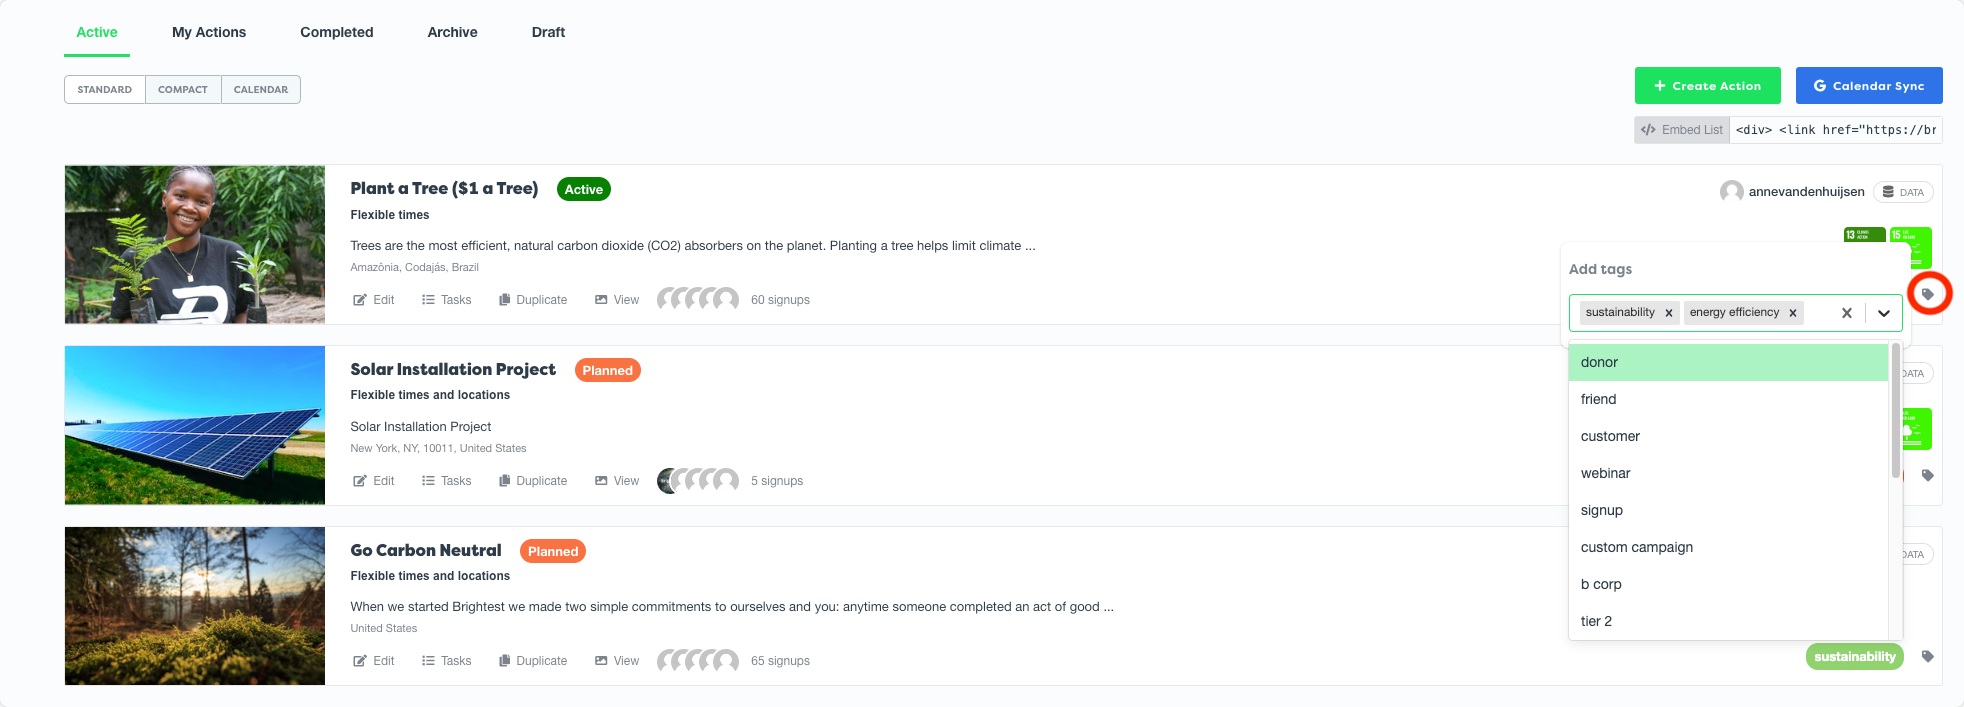
Use the "tag" icon to assign tags to actions
Assign tags to materials when adding materials to the platform or by editing the existing entry